

Let's Talk About Hats
- Vanessa

- Jan 21, 2019
- 2 min read
In case you haven't noticed already, winter is here...and in full force. I wasn't always a fan of wearing hats, mostly because I've had a hard time finding cute ones that fit over my big hair, but now that I'm older and have actually found hats that work for me, I can't imagine leaving the house without one. So I'm using this post to talk about hats.
As with many other things in crochet, hats can be made a few different ways, including flat, from the top down, and from the bottom up. Over the next few weeks, let's take a little time to talk through each method. But before we dive into the weeds, let me provide a quick overview here so you can know what to look forward to.
Flat

The best method of hat-making for beginners is the flat method. By flat, I mean that you essentially make a rectangle where the width is the circumference of your head and the length is the measurement from your forehead to your crown (plus a few inches for a folded brim, if you wish). Once you have the rectangle crocheted in a stitch of your choice, all you have to do to finish the hat is sew the two 'length' sides together and cinch or drawstring one of the 'width' sides closed. Slap that thing on your head, and you've got a hat!
From the Top Down
This method is exactly what it sounds like. You will start your hat at the top and work your way down to the brim. To start, you can choose to use either the magic circle or the chain circle method that I've already covered in this Crochet Classroom post. In this finished example, I followed the pattern on the label of a Caron Cupcake. This specific pattern uses entirely half double crochet stitches, but you can crochet a hat from the top down using any stitch. Just bear in mind that the stitches will be upside down when you wear the hat.
From the Bottom Up

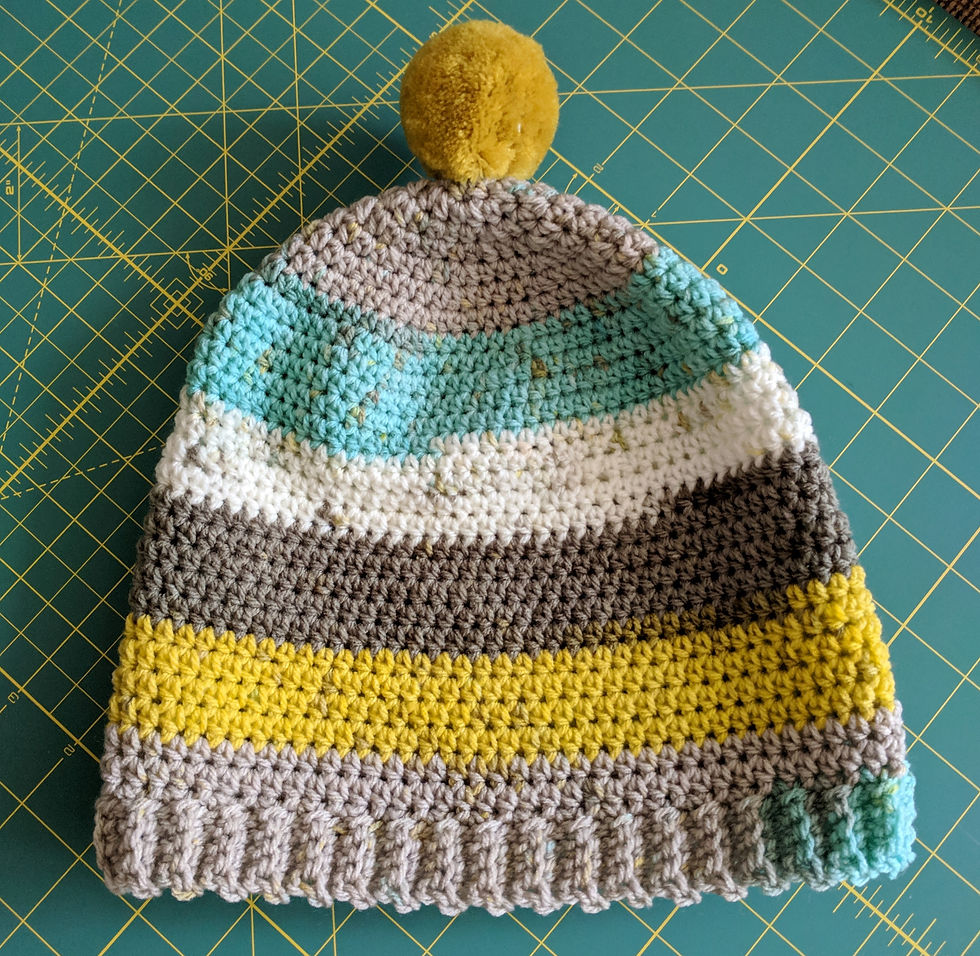
You've probably guessed by now, but making a hat from the bottom up means starting at the brim and working your way towards the crown, decreasing stitches the further up you go. Hats done using this method can start one of two ways: in the round or flat. If you choose to start in the round (like in the Vanessa original hat example), you will chain the chains that will fit around your head and join in a circle. Then you will start your stitch pattern.

If you choose to start flat, you will make a skinny rectangle, just long enough to fit around your head. Then you stitch the short ends together to form a ring; this is your hat brim. The next step is to work a specific number of stitches around one side of the ring. This method is the most complex way to make a hat, but is very rewarding if you're willing to put forth the effort.
Stay tuned for more details on each of these hat methods. I will share specific patterns I've used for the example photos and tips for how you can be successful making your own hats. :)


Comments