

How do I go 'round and 'round?
- Vanessa

- Aug 20, 2018
- 4 min read

Ready to attempt a pattern “in the round”? Well let's talk about it. There are a couple ways a pattern will tell you to get started. Let's walk through them here, so you'll feel prepared to make your own bag or hat or turtle.
As with the previous crash course, I have made a few YouTube videos (3 to be exact) to visually walk you through the concepts I discuss below. As a little bonus, I will leave you a link to the full pattern I’ve written for the Brain Slug hair pin. :)
Just a couple things up front before you continue reading:
Brush up on your slip knot, chain, and single crochet techniques. Feel free to go back to the Crash Course for a refresher.
I will be showing you 2 methods of starting a crochet project in the round: the chain circle method and the magic circle method.
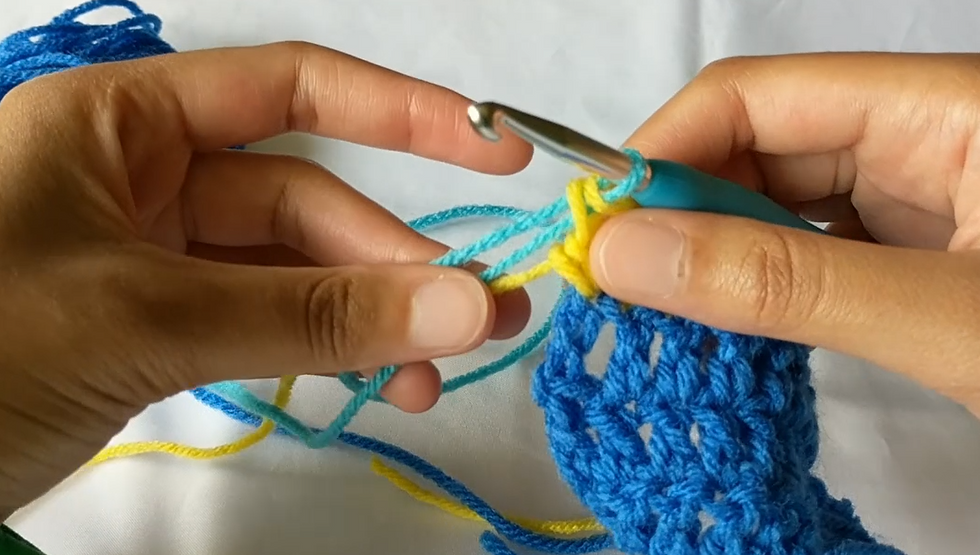
Both methods require knowledge of a slip stitch. I show this several times in the videos, but in short, you insert your hook into the stitch or chain (as indicated by the pattern). Pull up a loop (two loops on hook). Pull the new loop through the loop that was already on the hook. You should be left with one loop remaining. Piece of cake, right?!
Increasing: When a pattern tells you to “increase” it wants you to do 2 single crochets in the same stitch. This can also be done with double crochets or whatever stitch has been established by the pattern
Decreasing: I will cover this in a future post.
This is probably the simplest way to start a round project. You start as you would for a flat crochet project: slip knot and chaining. But before you start working back through your chains, you slip stitch to the first chain you made (where the slip knot is). A slip stitch is simple. You just put your hook through the first chain, draw up a loop (two loops on hook), and pull the new loop through the old loop. Your length of chains should now be joined in a circle. Now just follow the pattern as normal. The pattern may tell you to work into each stitch around, or it may tell you to work directly into the center of the circle, ignoring the number of chains you made. I show both options in the video, in case you’re still unsure.
I’ll be honest, this is my favorite method of beginning circular patterns. It can be a little intimidating at first, but I promise if you keep practicing you’ll get the hang of it. I highly suggest watching the video a few times. I feel like describing it in words would just confuse you, so I’ll save you from that train wreck.
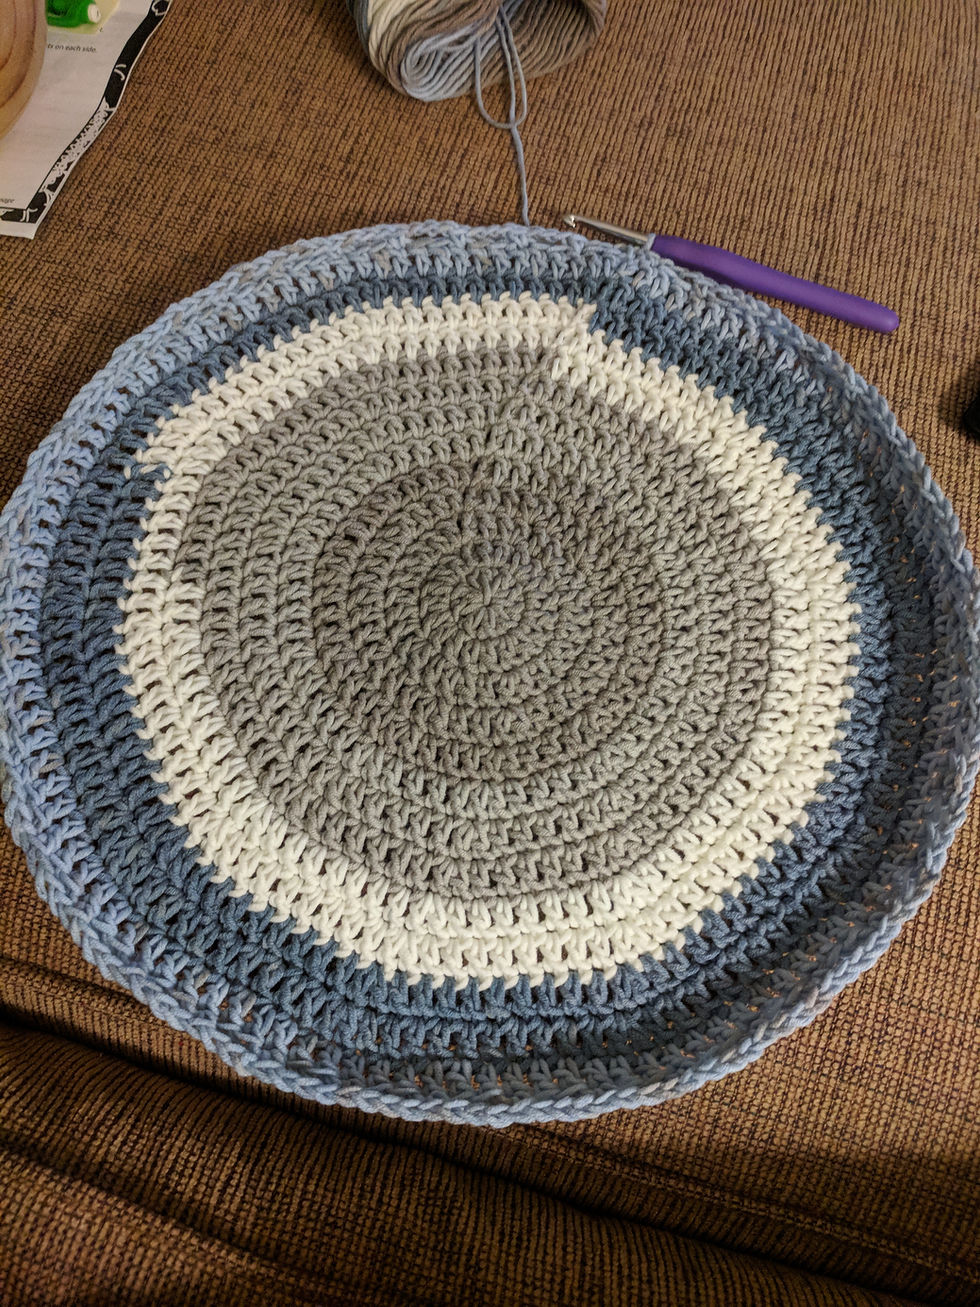
One thing I will discuss here is the concept of the ever-increasing circle. I mention this in the video, but I don’t actually go into too much detail on what it is. The ever-increasing circle is a technique used to create symmetrical circles that won’t buckle or curl up on themselves. Take the bottom of the bag I posted about last week; this is an example of an ever-increasing circle. Here’s what you do:
Make a magic circle (as shown into the video). Single crochet (sc) 6 times into the loop. Pull tail to cinch shut.
DO NOT slip stitch to the first stitch. Instead, do 2 sc in the first stitch (also called increase or inc). Do 2 sc in each stitch around. Should have 12 sc at the end of round 2.
Do 2 sc in first stitch of next round. Do 1 sc in the next stitch. Do 2 sc in next stitch, 1 in the next. Continue all the way around. (18 sc at end of round)
Do 2 sc in first stitch. Do 1 sc in each of the next 2 stitches. 2 sc in the next. 1 sc, 1 sc. Repeat all the way around. (24 sc at end of round)
Do 2 sc in first stitch. Do 1 sc in each of the next 3 stitches. 2 sc in the next. 1 sc, 1 sc, 1 sc. Repeat all the way around. (30 sc at end of round)
Do 2 sc in first stitch. Do 1 sc in each of the next 4 stitches. 2 sc in the next. 1 sc, 1 sc, 1 sc, 1 sc. Repeat all the way around. (36 sc at end of round)
Okay, I think you’ve got the hang of it by now. You just continue this pattern until the circle is as big as you want. When it’s the size you want, and you’re ready to start up the sides, you can single crochet (or double crochet if you’re feeling fancy) in each stitch around, maintaining the number of stitches in every row. If it helps, you can use a safety pin to mark the first stitch of the round so you don’t have to actively count each stitch.
As promised, here is the link to the Brain Slug pattern. Enjoy!


Comments