

I Want More Color in my Life
- Vanessa

- Oct 28, 2018
- 3 min read
If you haven’t guessed, the theme for this month is Changing Colors. It’s officially Fall and with the leaves changing colors outside, I thought it would be fun to help you change colors in your crochet projects. Okay...maybe that’s a bit cheesy, but stick with me here.
There are many ways of changing colors, but this month I am showing you two methods that should cover the bases for most color changing opportunities in your crochet work. As with all the other Crochet Classroom entries, there is an accompanying YouTube video to visually walk you through the techniques described here. Watch it, try it out, rip it out, try again, and, as always, feel free to reach out to me if you have any trouble.
Method 1
This is the traditional, most “technically correct” method for changing colors or adding a new ball of yarn to your project. It works for changing yarn colors both at the end of a row AND in the middle of a row. This works for every stitch you can do in crochet (e.g., chain, single crochet, double crochet, half double crochet, etc.), and it doesn’t require you to learn anything special. All you need to do is remember to STOP before you finish the stitch! Here’s a quick example to illustrate what I mean:
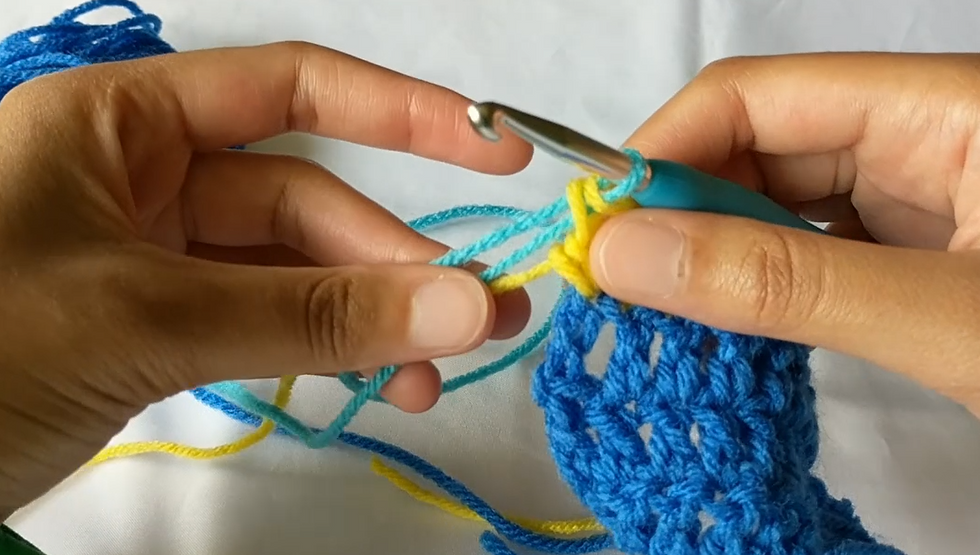
Say you’re stitching along a row of single crochets on a project. You look down and realize you’re quickly running out of yarn and decide to take the opportunity to switch to a different color. So on your next single crochet, you insert your hook into the stitch as normal and pull up a loop. Now you have two loops on your hook. You grab the new color of yarn, drape it over top of your hook (leaving a 6 inch tail), and finish the stitch (AKA draw through the two loops on the hook). You leave the two tails fall to the back for weaving in later, and continue stitching along your row with the new color.

Sounds easy peasy right?! The same method applies to double crochets (as shown in the YouTube video) as well as half double crochets and any other stitches you’re attempting: stop right before the last step in the stich (e.g., with two loops on the hook for double crochets), grab your new color, and finish the stitch like normal.
Method 2
Unlike method 1, this method can ONLY BE USED and the end of a row or the start of a new round (in circular work). You can use this method to add to an already finished swatch (as shown in the video) or to make really clean stripes on a scarf or a blanket. Let’s talk through a quick example, using the little pumpkin purse as an example.
Let’s say you’ve completed the number of rounds you need in orange, you’ve fastened off, and you’re ready to switch to the brown. So you grab the brown yarn, make a slip knot on your hook (just like you’re starting a new project), insert your hook into the stitch you want to join the new color on (usually indicated in the pattern), and draw up a loop through both the stitch and the slip stitch on your hook. Then you chain however many the pattern indicates and continue crocheting as normal.

With this method you have the option of leaving your tails to the back or laying them over the top of the work and stitching over top of them. The slip knot provides a little extra security and peace of mind that your hard work won’t come unraveled should your tails work their way out.
Annnddd...that’s it! You’re ready to start switching up the colors in your crochet projects. One additional tidbit I included in the video is the concept of self-striping yarn. As a very lazy crocheter, I tend to use self-striping yarn more often than I manually change colors in projects simply because the yarn does all the work for you. I show you a few that I have hanging out in my stash, but there are tons of different types of self-striping yarn on the market that you can pick-up and play with for any project. One thing to note: self-striping yarn is not to be confused with variegated yarn. While they are similar concepts, they are not the same. Variegated yarns change colors very quickly (every 3 or 4 stitches, depending on the stitch and hook size), while self-striping yarn colors stay the same color for a longer length of yarn (maybe 3 or 4 rows, depending on the width of the project). Let me know in the comments below if you’d like me to talk about specific yarns more in depth.
That’s all for now! Have fun adding color to your projects, and don’t forget to send me pictures! :)


Comments